Pigeon Pose : .Release Deep Hip Tension
Unlock tight hips to release tension, align the pelvis, and stand taller.
Pigeon Pose creates deep length in the glutes and external hip rotators. This corrects the anterior pelvic tilt often caused by sitting, allowing the spine to stack naturally without compression.
How to · How To Do Pigeon Pose
The goal is to square the hips and find a deep stretch in the outer hip, not to force the knee to the floor.
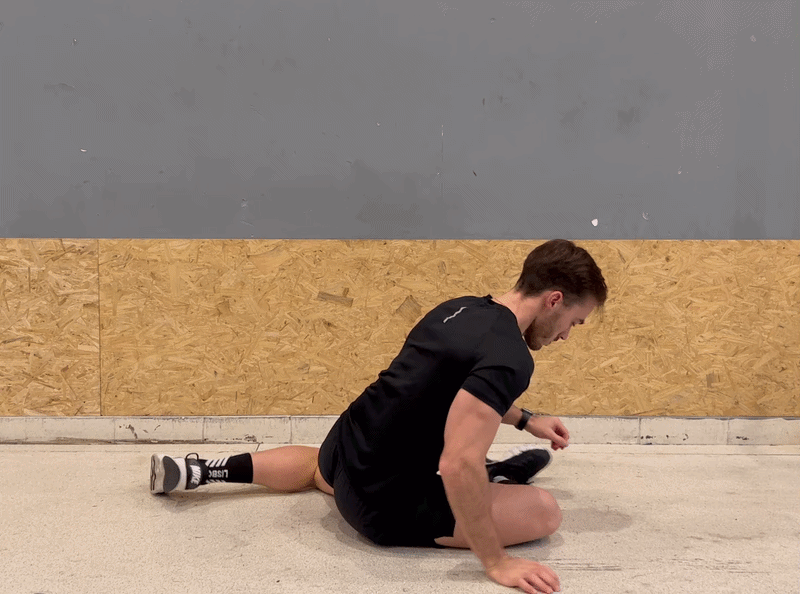
- Tabletop Prep: Begin on all fours (tabletop position) with hands under shoulders and knees under hips. Ensure a neutral spine to start.
- Leg Position: Bring your right knee forward towards your right wrist. Angle your right shin diagonally under your torso towards your left hip (the angle depends on flexibility).
- Extend Back: Slide your left leg straight back, keeping the top of the foot flat on the mat. Lower your hips towards the floor.
- Square the Hips: This is crucial: ensure your hips are level. Do not roll onto the right buttock. If your right hip doesn't touch the floor, place a block or cushion under it for support.
- Fold (Optional): Keep the torso upright for a hip flexor stretch, or slowly walk your hands forward to fold over the front leg for a deeper glute stretch.
- “Keep hips square to the front of the mat—imagine headlights on your hip bones pointing forward.”
- “Don't force the front shin to be parallel to the front of the mat if your knee hurts.”
- “Breathe deeply into the tightest part of the hip.”


Sets & Frequency · Time Under Tension (Height-Focused)
Mobility requires time. Do not rush this stretch; allow the fascia to release slowly.
Tip: If 2 minutes feels impossible, start with 45 seconds and breathe slowly (4 counts in, 8 counts out) to downregulate your nervous system.
Variations · Scaling for Comfort
Use props to ensure your hips remain square and your knee remains pain-free.


Height Impact · Pelvic Alignment & Stance
- Tight external rotators (glutes/piriformis) are a primary cause of "Duck Butt" (Anterior Pelvic Tilt) or "Flat Back" (Posterior Pelvic Tilt), both of which shorten effective height.
- By releasing this tension, the pelvis can return to a neutral bowl shape. A neutral pelvis provides a level foundation for the lumbar spine to stack vertically.
- The "Upright" variation also stretches the psoas (hip flexor) of the back leg, further reducing the pull that causes lower back compression.

Panel 1 – Pelvis Alignment in Pigeon
Side view of Man (Asian man, 29, bun, lean physique) in an upright version with hips squared more than usual, front hip supported by a block, spine tall. Add a soft light blue glow around his front hip, glute and the front of his back hip to show how hip opening helps pelvic alignment. 4:3 aspect ratio, full body.

Panel 2 – Standing Posture with Freer Hips
Side view of Man standing tall: feet hip-width, hips level, pelvis neutral, lower back comfortable, upper body relaxed. Add a soft light blue glow across both hips, outer thighs and lower spine to show how freed-up hips support a taller stance. 4:3 aspect ratio, full body.
Form & Safety · Key Technique Cues, Precautions & Common Mistakes
- Keep the back foot straight—don't let it sickle inward (banana foot).
- Protect the front knee by flexing the front foot slightly.
- Focus on leveling the hips rather than getting them to the floor.
- Breath is the driver; exhale to deepen the sensation.
The knee is a hinge joint and should not rotate deeply under load.
- If you feel sharp pain in the **knee**, stop immediately.
- Use the "Figure-4" stretch on your back as a safer alternative if knee pain persists.
- Never force the front shin to be parallel to the mat if your hips aren't ready.
- Rolling onto the hip of the front leg (unsquared hips).
- Slumping the shoulders forward in the upright variation.
- Holding the breath due to intensity.
- Forcing depth at the expense of spinal alignment.
**Why it steals height:** Collapsing sideways twists the spine and negates the stretch in the hip rotators. It reinforces asymmetry rather than fixing it.

**Why it steals height:** This puts dangerous torque on the knee ligaments and causes the body to tense up in protection mode, preventing the deep pelvic release needed for height.

Pair With · Best Exercises to Pair With Pigeon
Pigeon works best when preceded by active warm-ups or followed by decompression:
Warm up the hips with 90/90 switches, perform Pigeon to deeply release tension, and finish with a Passive Hang to let the now-loose spine elongate.
FAQ · Common Questions About Pigeon Pose
-
Q1 Why does my front knee hurt? ›Knee pain usually means your hip isn't open enough to support the angle, so the rotation is forced into the knee joint. This is dangerous. Immediate fix: bring the front foot closer to the groin (lessening the angle) or use the Reclined Figure-4 stretch on your back instead.
-
Q2 Should I fold forward or stay upright? ›Both are valuable. Staying upright increases the stretch on the back leg's hip flexor (psoas), which is great for correcting anterior pelvic tilt. Folding forward shifts the intensity to the front leg's glute and outer hip. Mix both for best results.
-
Q3 My hips don't touch the floor. Is that okay? ›Yes! It is completely normal. Do not force them down, as this will twist your lower back. Instead, place a yoga block, cushion, or folded blanket under the hip of the front leg. This fills the gap and allows you to relax into the stretch safely.