Ankle Mobility : .Align Postural Foundation
Fix tight ankles, the hidden cause of slouching and improper spinal stacking.
Poor ankle flexibility (dorsiflexion) is common but forces your knees to cave and pelvis to tilt, preventing you from ever standing straight. This drill resets your entire vertical alignment from the ground up.
How to · How To Do Ankle Dorsiflexion Mobilization
The goal is to drive the knee forward over the foot without allowing the heel to lift.
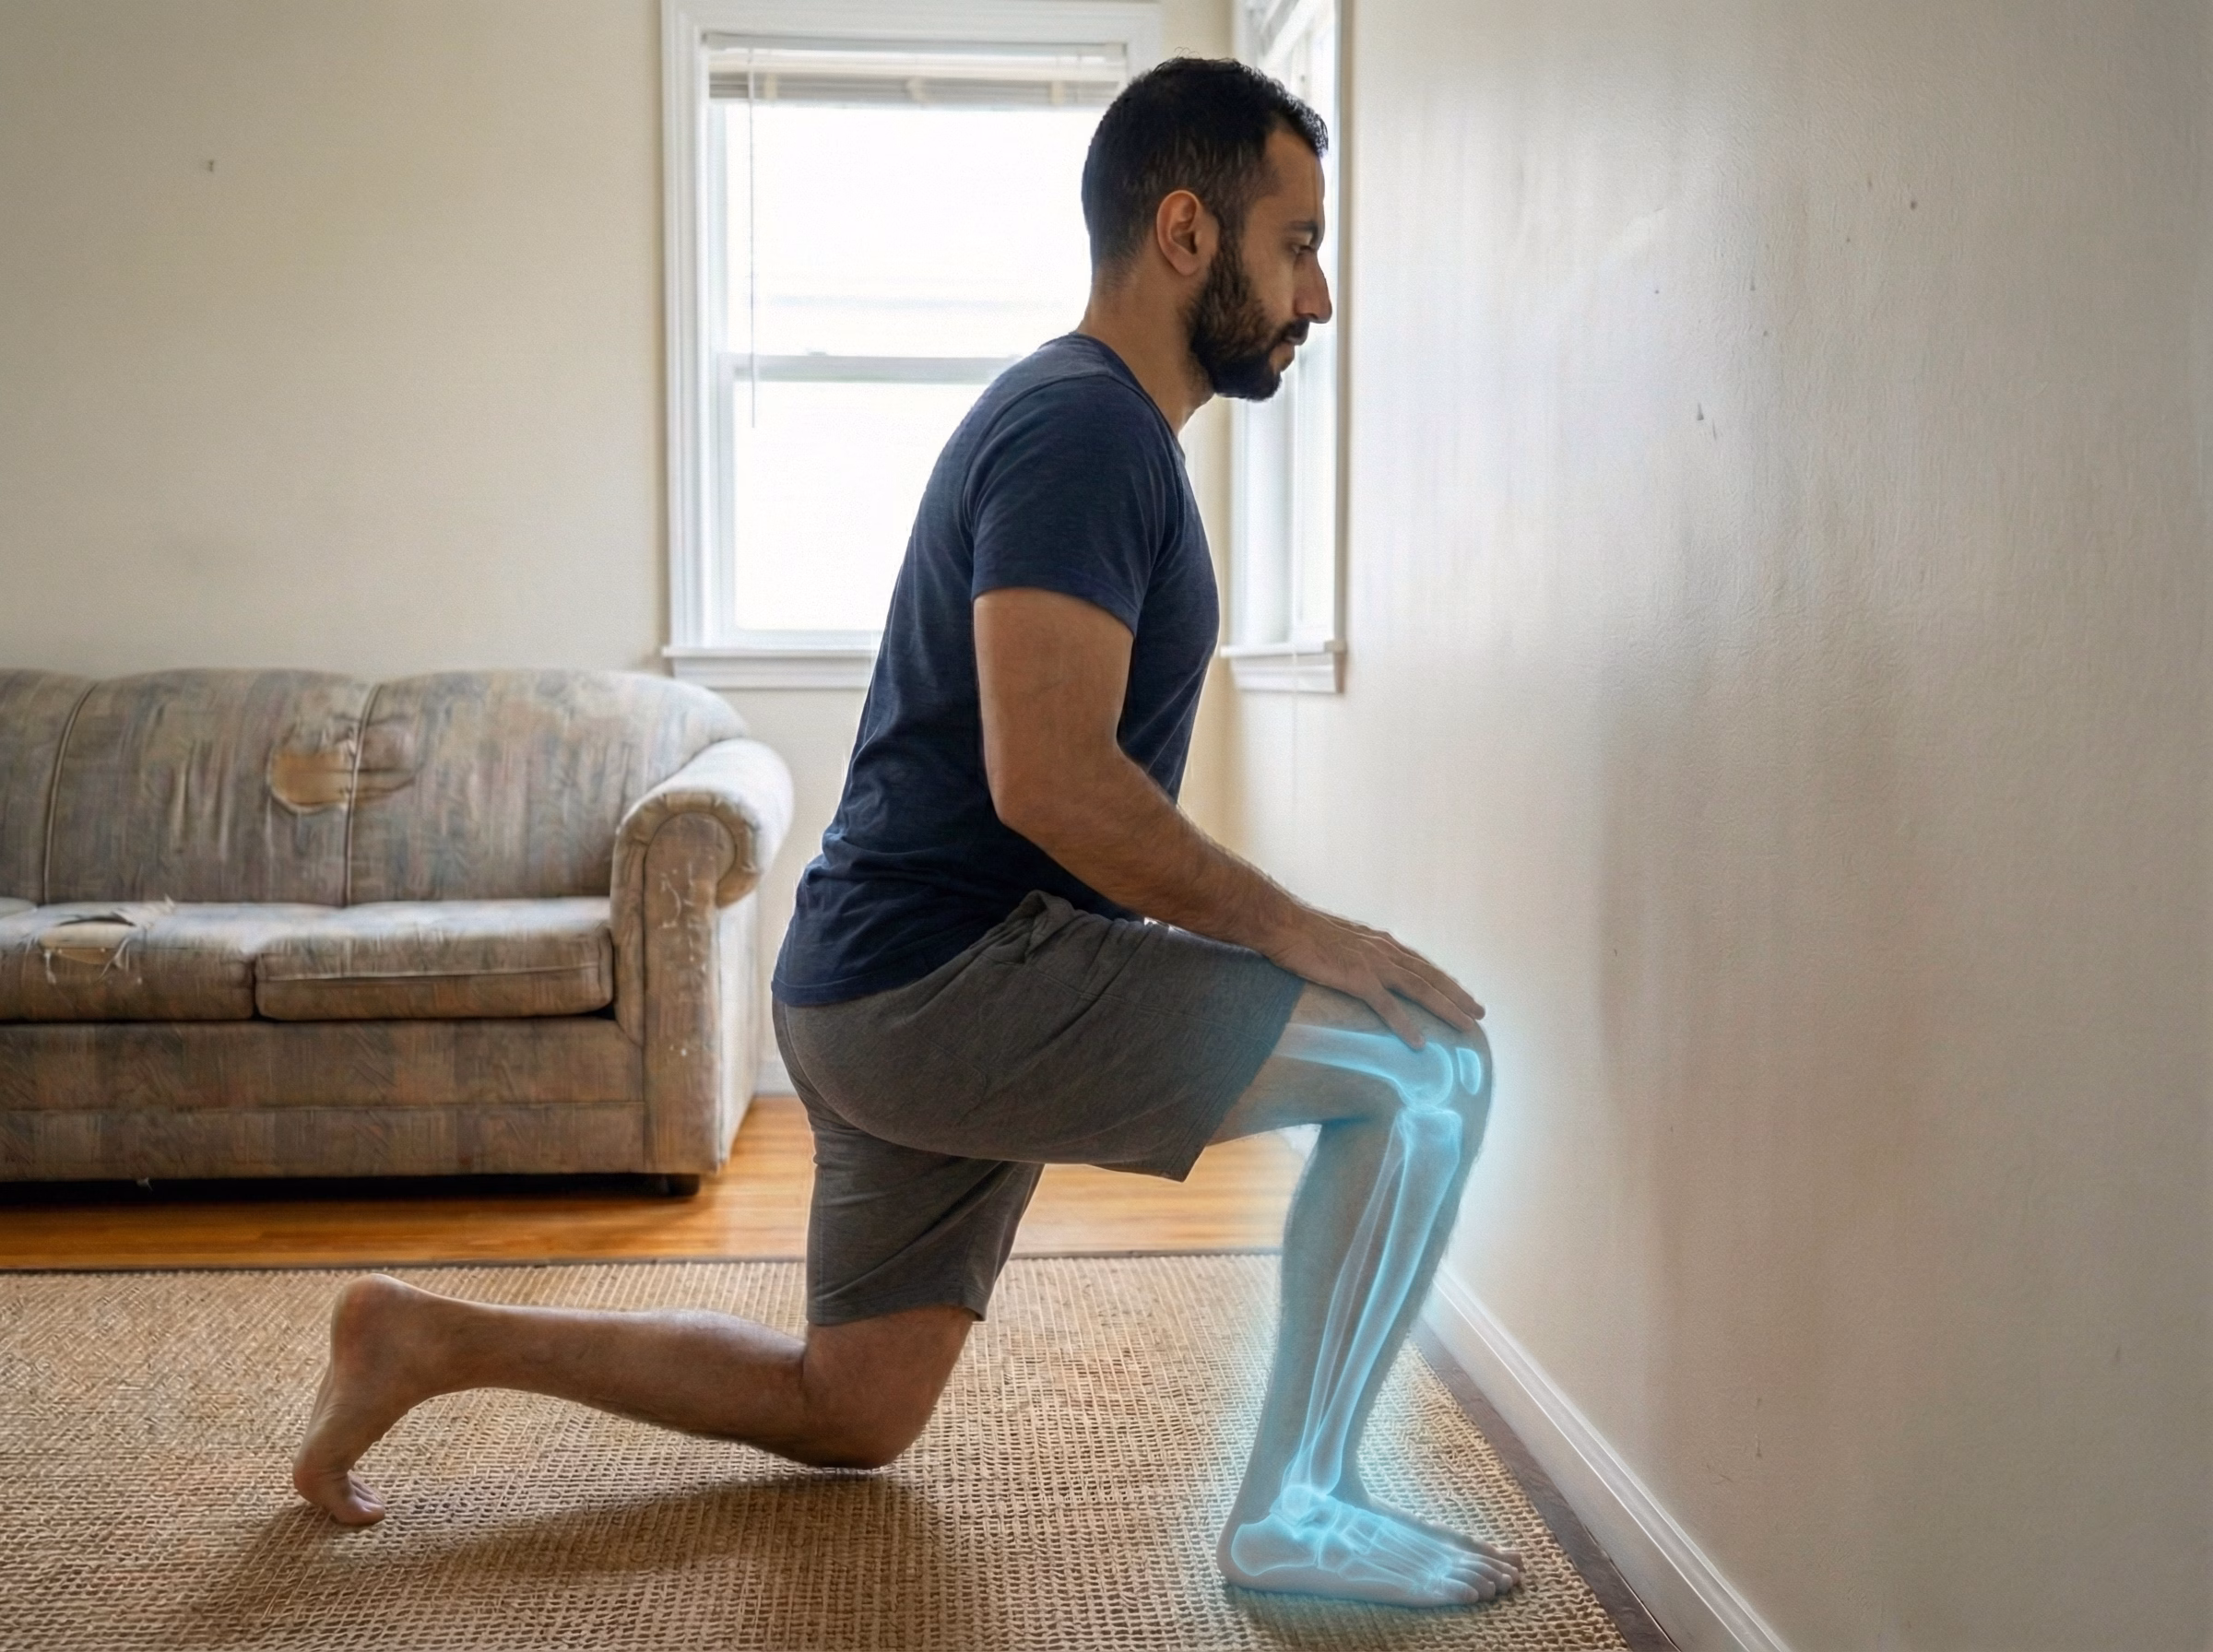
- Half-Kneeling Setup: Start in a half-kneeling position facing a wall, with your front foot (e.g., right foot) flat on the mat a few inches away from the wall, and the back knee down. Keep his torso upright.
- Initial Distance Check: Drive his right knee forward until it lightly touches the wall *without* his heel lifting. Mark this spot with his toe—this is your maximum range. If he can easily touch the wall, move his foot further back.
- Deeper Ankle Mobilization (Drive): From the starting position, drive his right knee straight forward toward his maximum mark, maintaining a flat heel and ensuring the knee tracks directly over the middle of his foot (second toe). His torso should lean slightly forward in one straight line.
- Rocking Repetitions: Perform rhythmic, controlled rocking motions: push the knee toward the wall, hold for a count of one or two, and then rock back slightly to release the tension, all while keeping the heel down.
- Switch Sides: Complete all repetitions on the front foot before switching to the opposite leg.
- “Glue his heel to the floor—that’s the non-negotiable part.”
- “Keep the knee driving over his second toe, not collapsing inward.”
- “He should feel a stretch deep in his calf or lower shin, not a pinch in his ankle.”


Sets & Frequency · Reps, Sets, and Weekly Plan (Height-Focused)
This drill is best performed dynamically to improve range of motion before standing work.
Tip: Always focus on quality over quantity. If his heel lifts, he’s not improving ankle mobility; he’s shifting his weight. Move his foot closer and keep the heel anchored.
Variations · Scaling the Mobility Challenge
Use the wall distance to adjust the intensity, or try the short range for sensitive joints.


Height Impact · How Ankle Mobility Supports His Vertical Line
- When ankles are stiff, his body compensates by pronating (collapsing) his arches and letting his knees cave inward when he stands or walks. This rotation begins to destabilize the whole leg line.
- The destabilization forces his pelvis to anteriorly tilt (dump forward), creating a swayback posture that compresses his lower spine and steals height from the lumbar region.
- By restoring proper dorsiflexion, his knees and hips can track cleanly over his feet, allowing his pelvis to return to a neutral position. This immediately removes compressive force from his lower back.
- This foundation work allows core exercises and posture drills like Tadasana to be truly effective, preventing his body from simply falling back into its old, shorter compensation patterns.

Panel 1 – Standing Posture with Clean Ankle Bend
Side view of he in a small lunge stance away from the wall: front knee bent over mid-foot, heel down, back leg behind, torso tall, showing smooth ankle dorsiflexion. Add a soft light blue glow around his front ankle, lower shin, and calf to show how that base alignment supports posture. 4:3 aspect ratio, full body.

Panel 2 – Full-Body Posture Line From Feet Up
Full standing side view of he in a neutral posture, feet flat, ankle line vertical, knees and hips stacked, spine long. Add a soft light blue glow starting around both ankles and calves, traveling up through knees, hips, and into the lower spine to show how better ankle motion supports the whole height line. 4:3 aspect ratio, full body.
Form & Safety · Key Technique Cues, Precautions & Common Mistakes
- Keep his front heel pressed firmly into the floor at all times.
- Drive his knee over his second toe to maintain ankle and arch stability.
- Maintain a tall torso; avoid excessively rounding or rocking his back.
- Use rhythmic rocking rather than static holding for maximum mobility benefit.
This drill is generally safe, but should be avoided if he has acute foot or ankle pain.
- If he feel pinching in the front of his ankle, he may be driving too far. Reduce the range.
- Focus on stretching the calf/Achilles, not forcing the joint itself.
- Stop if he feels any sharp pain.
- Lifting his heel off the floor to compensate for lack of mobility.
- Allowing his knee to cave inward (valgus collapse), flattening his arch.
- Rushing the repetitions or using momentum instead of control.
- Pushing through pinching pain instead of a stretch/tension feeling.
**Why it steals height:** Lifting the heel means he is no longer stretching the ankle/calf; he is just transferring weight to his forefoot. This reinforces a dysfunctional pattern that keeps his center of gravity forward, worsening his overall posture.

**Why it steals height:** This collapse is exactly the compensation pattern the drill is meant to fix. It destabilizes the knee and hip, leading directly back to the pelvic tilt and spinal compensation that causes height loss.

Pair With · Best Exercises to Pair With Ankle Mobilization
Ankle mobility should always precede exercises that depend on a stable, stacked vertical line:
First, unlock his ankles. Then, immediately use Tadasana or Standing Posture Reset to teach his newly mobile body how to stack vertically, maximizing his height gains.
FAQ · Common Questions About Ankle Mobilization
-
Q1 How can tight ankles affect his height? ›Tight ankles force a kinetic chain reaction: they prevent him from keeping his weight balanced over his feet when he stands or walks. This forces his knees to collapse and his pelvis to tilt forward (anterior pelvic tilt), which in turn creates a deep swayback that compresses his lower spine and shortens his overall vertical line.
-
Q2 Should he feel a stretch in his calf or his ankle? ›He should primarily feel a stretch in his deep calf and Achilles tendon area. If he feels a sharp, bony pinch in the front of his ankle joint, he is likely pushing too hard or too far. Back off the range of motion and focus only on the tension/stretch behind the ankle.
-
Q3 How close should his foot be to the wall? ›Start with his foot far enough away that he can barely touch the wall with his knee while keeping his heel completely flat. As his mobility improves, he should move his foot back in small increments (1-2 cm) to gradually increase the mobility challenge and track his progress.