Height Recovery Impact: 33/100
Height Pillar: Pelvic Tilt & Back
Side Plank trains lateral core stability, helping your spine stay upright instead of collapsing or leaning. Strong side-body muscles prevent one-sided sagging that can subtly shorten your posture and throw your alignment off. Holding this position teaches your trunk to support a tall, stacked spine under load. Over time, this stability helps you stand and move with a more elongated posture.

Height Recovery Impact: 62/100
Height Pillar: Pelvic Tilt & Back
Butterfly Stretch targets the inner thighs and hips, which can restrict how your pelvis moves and sits. By gently pressing your knees toward the floor, you improve hip mobility and reduce tension that locks your lower body into a cramped position. Better hip freedom supports a more neutral pelvic tilt, helping your spine align taller and making it easier to hold a long posture.

Height Recovery Impact: 66/100
Height Pillar: Pelvic Tilt & Back
Pigeon Pose opens the hips and glutes, areas that can lock the pelvis in poor alignment. By sinking into the stretch, you reduce tightness that pulls your spine out of a tall, neutral position. Improving hip rotation and glute flexibility makes it easier to stand upright without compensations, supporting a smoother posture line and helping you maintain more of your recovered height.

Height Recovery Impact: 81/100
Height Pillar: Pelvic Tilt & Back
This stretch targets the hip flexors, which often get tight from sitting and can pull the pelvis into an excessive forward tilt. By opening the front of the hip, you make it easier for your pelvis and lower back to return to a more neutral, lengthened alignment. That improved positioning supports a taller standing posture and helps you avoid the “compressed” look around the midsection.
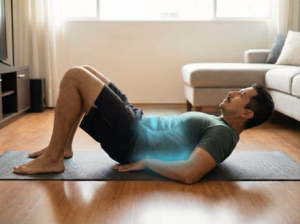
Height Recovery Impact: 68/100
Height Pillar: Pelvic Tilt & Back
The McGill Curl-Up strengthens your core without excessive spinal flexion, teaching you to brace while maintaining a neutral lower back. This helps protect against collapse and instability that can lead to chronic tightness and compression. A stronger, more stable trunk supports an upright posture, allowing your spine to stack tall and helping you maintain more of your true standing height.
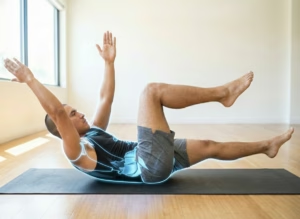
Height Recovery Impact: 71/100
Height Pillar: Pelvic Tilt & Back
Dead Bug trains deep core control while keeping your lower back in a neutral, non-arched position. By moving your arms and legs while the spine stays stable, you build the strength needed to support good posture in real life. This reduces the sagging or sway that shortens your silhouette, helping you stand closer to your full height through better trunk stability and alignment.
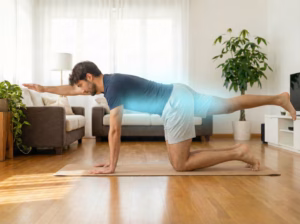
Height Recovery Impact: 72/100
Height Pillar: Pelvic Tilt & Back
Bird Dog builds core and hip stability while training your spine to stay long and controlled. Reaching opposite arm and leg forces your trunk muscles to support a neutral back position instead of collapsing or over-arching. This stability is key for holding good posture during walking, standing, and lifting, allowing you to maintain more of your recovered height without constant effort.
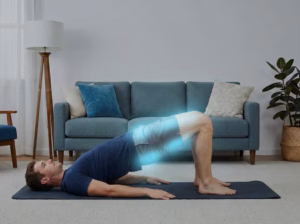
Height Recovery Impact: 70/100
Height Pillar: Pelvic Tilt & Back
Glute Bridges strengthen the muscles that pull your pelvis out of an exaggerated forward tilt. By driving through your heels and squeezing your glutes, you support a more neutral lower-back position and reduce chronic arching. That alignment makes it easier for the spine to stack tall rather than collapse. Over time, this helps you present and maintain a longer, more upright posture.
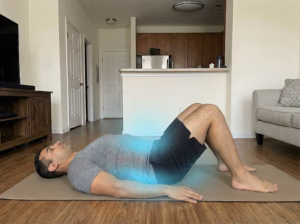
Height Recovery Impact: 82/100
Height Pillar: Pelvic Tilt & Back
This drill teaches you to control pelvic position, which directly affects lower-back curve and apparent height. By flattening the excessive arch in your lower back, you reduce “swayback” and bring the spine into a more neutral, elongated alignment. This improves posture efficiency and helps you avoid the shortened look that comes from an anteriorly tilted pelvis and overarched lumbar spine.